> ## Documentation Index
> Fetch the complete documentation index at: https://docs.tabby.ai/llms.txt
> Use this file to discover all available pages before exploring further.
# Magento 2 Plugin Installation
> Install the Tabby extension for Magento 2 with Composer, configure your API keys, and go live.
Tabby works on the Magento 2 platform for all supported countries.
The Tabby extension adds Tabby as a payment method at checkout, shows Tabby promotions on your product and cart pages, and can share your product feed with the Tabby Shop.
| Requirement | Value |
| - | - |
| Magento | 2.4.x (`magento/framework ^103.0`) |
| PHP | 7.1 or newer |
| Access | Composer and command-line access to your Magento project |
## Installation Steps
Sign up at [merchant.tabby.ai](https://merchant.tabby.ai/) (KSA: [merchant.tabby.sa](https://merchant.tabby.sa/)) and fill in all your business details. Your test API keys are then available in the Merchant Dashboard under **Business profile → Stores**.
[Install the extension with Composer](#install-with-composer) - the recommended way to install it and to update it later.
[Configure Tabby as a payment method](#configure-tabby-as-a-payment-method) using your test keys.
[Place a test order and refund it](#test-your-integration) to confirm that the full flow works.
Replace the test keys with your live keys and [deploy to production](#connect-to-the-live-tabby-environment).
Install and test the extension in a staging environment first, and keep a backup of your Magento files and database so you can roll back.
## Install with Composer
`tabby/m2-payments` is a metapackage that pulls both Tabby modules: `tabby/m2-checkout` (payment methods, promotions, webhooks) and `tabby/m2-feed` ([product catalogue](/e-commerce-platforms/magento-2/magento-2-product-catalogue)).
```bash theme={"dark"}
composer require tabby/m2-payments
php bin/magento module:enable Tabby_Checkout Tabby_Feed
php bin/magento setup:upgrade
php bin/magento setup:di:compile
php bin/magento setup:static-content:deploy -f
php bin/magento cache:flush
```
Confirm that both modules are enabled:
```bash theme={"dark"}
php bin/magento module:status Tabby_Checkout Tabby_Feed
```
### Update the extension
Run the same sequence with `composer update` to move to the latest release:
```bash theme={"dark"}
composer update tabby/m2-payments --with-dependencies
php bin/magento setup:upgrade
php bin/magento setup:di:compile
php bin/magento setup:static-content:deploy -f
php bin/magento cache:flush
```
We recommend opening the Tabby settings in the Magento admin after an update and clicking **Save Config**, even if you change nothing. Saving re-applies your configuration to the settings the installed version supports, and registers the webhooks for any store that is missing them.
If Composer stops with *"Higher matching version 7.0.2 of tabby/m2-payments was found in public repository packagist.org"*, your project is pinned to an older constraint. Require the version range explicitly and run the update again:
```bash theme={"dark"}
composer require tabby/m2-payments:^7.0
```
## Other Ways to Install
Composer is the supported path. Use one of these only if Composer is not available to you.
1. Download the [extension archive](https://storage.googleapis.com/plgns/magento2-latest.tar.gz).
2. Create the directory `Magento2_root/app/code/Tabby/Checkout/` if it does not exist.
3. Unpack the archive and move all files into `Magento2_root/app/code/Tabby/Checkout/`.
4. Verify that **Tabby\_Checkout** appears in the list of disabled modules:
```bash theme={"dark"}
php bin/magento module:status
```
5. Enable the module and rebuild:
```bash theme={"dark"}
php bin/magento module:enable Tabby_Checkout
php bin/magento setup:upgrade
php bin/magento setup:di:compile
php bin/magento setup:static-content:deploy -f
php bin/magento cache:flush
```
The archive contains the checkout module only. The [product catalogue](/e-commerce-platforms/magento-2/magento-2-product-catalogue) module ships through Composer, and every future update has to be applied by hand.
The extension is published as [Tabby M2 Payments](https://commercemarketplace.adobe.com/tabby-m2-payments.html). Add it to your Adobe Commerce account and install it from your Marketplace purchases. Adobe delivers the same Composer package, so the Magento commands in [Install with Composer](#install-with-composer) still apply.
## Configure Tabby as a Payment Method
Sign in to your Magento 2 admin portal and go to ***Stores > Configuration > Sales > Payment Methods > Tabby Payments***.
In the **Tabby Api** section:
| Setting | Value |
| - | - |
| Merchant Public Key, Merchant Secret Key | Your test keys from the Merchant Dashboard |
| Aggregate store by currency | **Yes** - the extension derives the merchant code from each store's base currency (`AE`, `SA`), which are the default codes Tabby registers for your account. Set it to **No** only if you use [your own store codes](#use-your-own-magento-store-codes). |
| Capture on | **Order placed**, unless your account manager agreed on a different moment |
| Debug | **Yes** while you are testing |
Then enable the payment method in the **Tabby Checkout - Split in 4** section and click **Save Config**. Saving validates your keys and registers your webhooks with Tabby.
If the changes do not take effect immediately, go to ***System > Cache Management***, click **Flush Magento Cache**, then sign out and sign back in to reset permissions.
### Manage Tabby Product Catalogue Feature
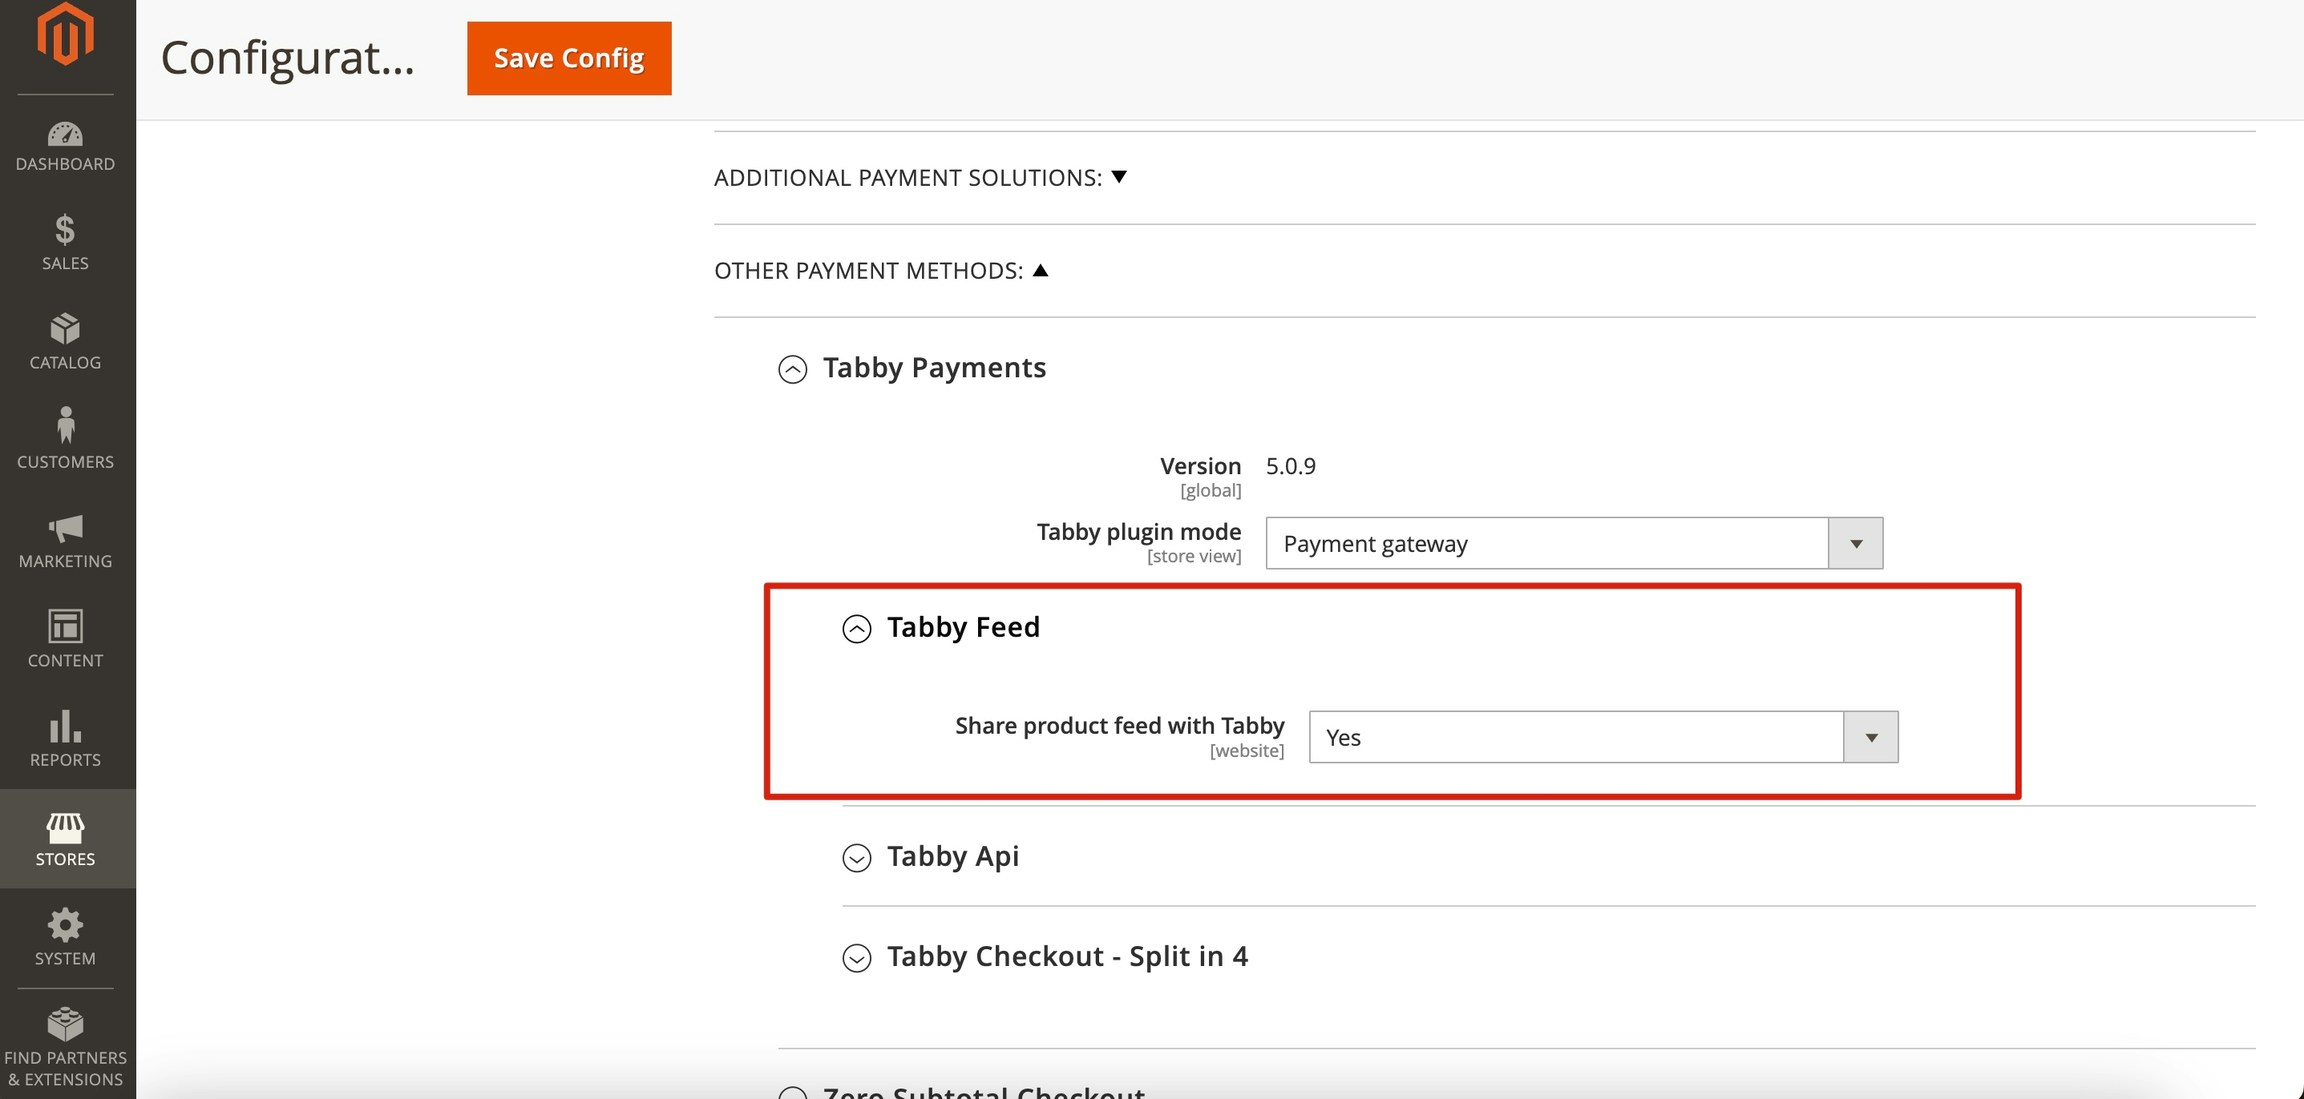
The [product catalogue](/e-commerce-platforms/magento-2/magento-2-product-catalogue) lists your products on the Tabby Shop. Enable it in ***Stores > Configuration > Sales > Payment Methods > Tabby Payments > Tabby Feed***.
The Tabby Product Catalogue feature works with **live API keys** only.
 ## Test Your Integration
Place an order with Tabby and refund it (create a Credit Memo) to confirm that the full flow works.
When the test order and the refund go through, you can move to the live environment yourself. Tabby does not run a separate sign-off on your integration.
## Connect to the Live Tabby Environment
Copy the live Public and Secret keys from the Merchant Dashboard under **Business profile → Stores**. If the live keys are not shown there yet, ask Tabby Partner Support at `partner@tabby.ai` (or `partner@tabby.sa` for KSA) to make them visible.
Enter them in ***Stores > Configuration > Sales > Payment Methods > Tabby Payments*** on your production site.
Click **Save Config**. Webhooks are registered per key pair, so this save is what creates your live webhooks - do it on production even if you copied the configuration over from staging and the keys are already in place.
## Specific Settings
### Promotions Only Mode
If your checkout runs through another provider, the plugin can serve Tabby promotions only: it enables the product and cart page snippets and hides Tabby at checkout.
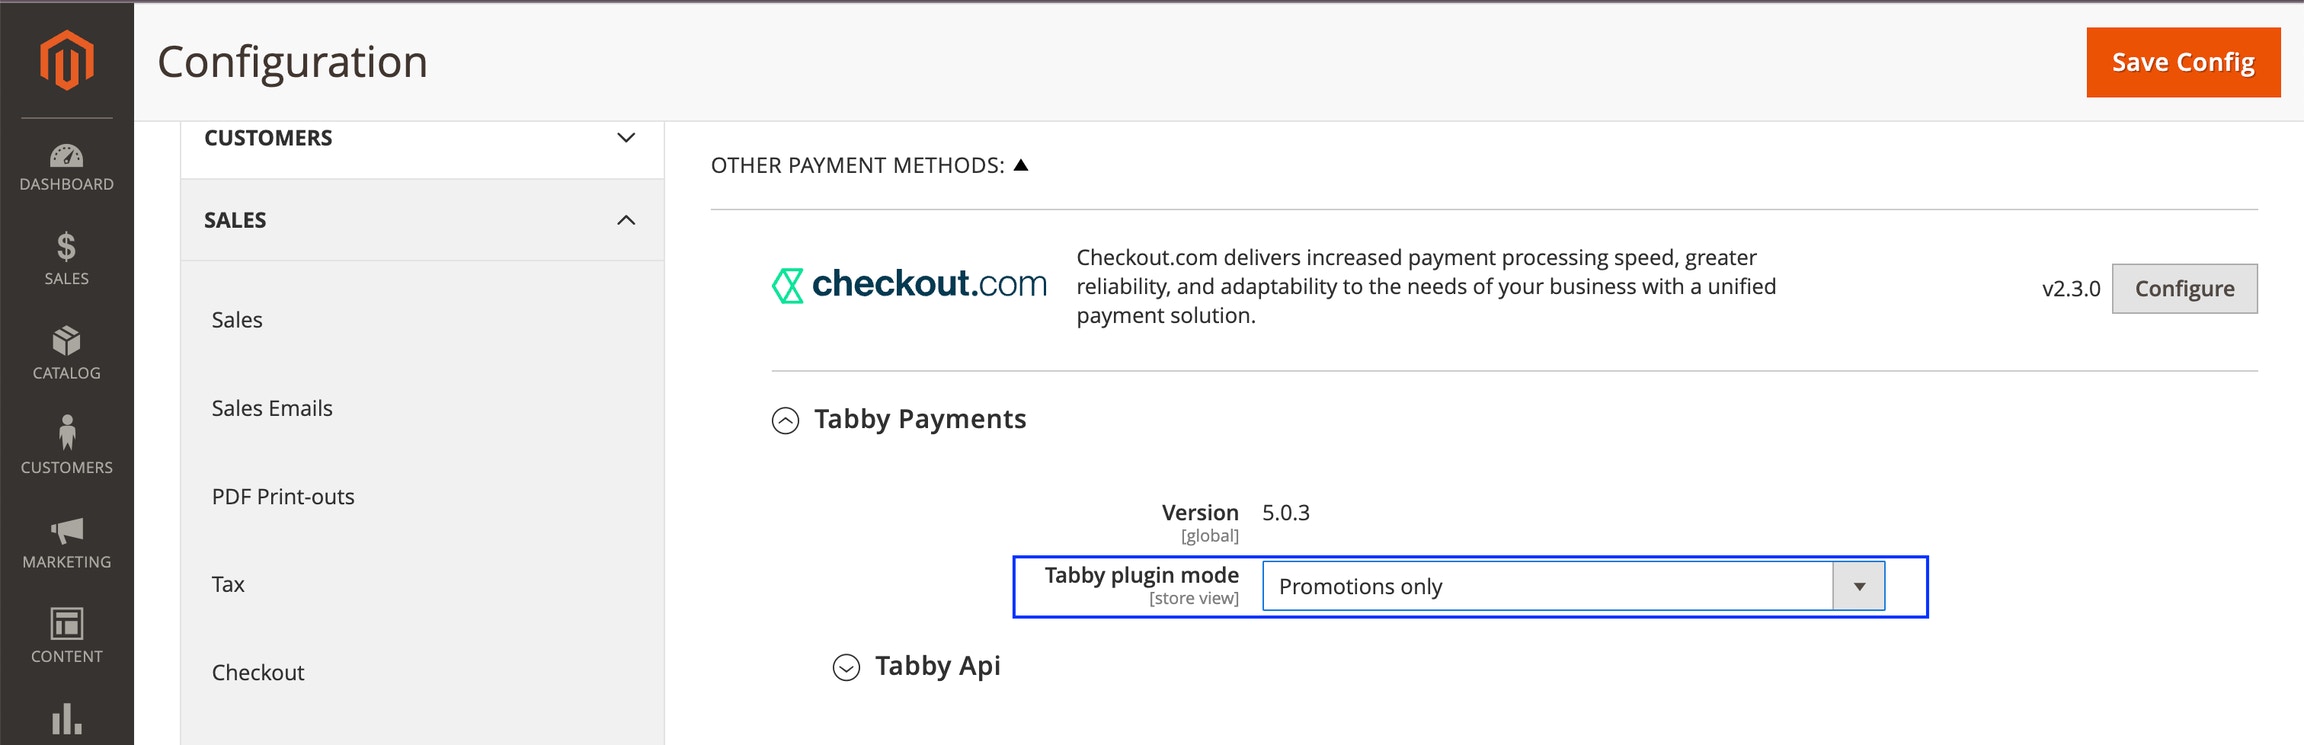
Go to ***Stores > Configuration > Sales > Payment Methods > Tabby Payments***, and set ***Tabby plugin mode*** to ***Promotions only***:
## Test Your Integration
Place an order with Tabby and refund it (create a Credit Memo) to confirm that the full flow works.
When the test order and the refund go through, you can move to the live environment yourself. Tabby does not run a separate sign-off on your integration.
## Connect to the Live Tabby Environment
Copy the live Public and Secret keys from the Merchant Dashboard under **Business profile → Stores**. If the live keys are not shown there yet, ask Tabby Partner Support at `partner@tabby.ai` (or `partner@tabby.sa` for KSA) to make them visible.
Enter them in ***Stores > Configuration > Sales > Payment Methods > Tabby Payments*** on your production site.
Click **Save Config**. Webhooks are registered per key pair, so this save is what creates your live webhooks - do it on production even if you copied the configuration over from staging and the keys are already in place.
## Specific Settings
### Promotions Only Mode
If your checkout runs through another provider, the plugin can serve Tabby promotions only: it enables the product and cart page snippets and hides Tabby at checkout.
Go to ***Stores > Configuration > Sales > Payment Methods > Tabby Payments***, and set ***Tabby plugin mode*** to ***Promotions only***:
Promo only mode
### Use Your Own Magento Store Codes
By default there is nothing to send us: with **Aggregate store by currency** set to **Yes**, the extension derives the merchant code from the store's base currency (`AE` for AED, `SA` for SAR) and Tabby registers those codes for your account.
Use your Magento store codes instead when you need a separate Tabby merchant code per store group, for example for separate reporting or separate payment plans per brand:
In the Magento admin, go to ***Stores > All Stores*** and copy the **Code** of every store group you sell with.
 Ask Tabby Partner Support at `partner@tabby.ai` (or `partner@tabby.sa` for KSA) to set them up as custom merchant codes, for example `website_store_ae`. Wait for confirmation that the codes are registered on Tabby's side.
Set **Aggregate store by currency** to **No**. The extension now sends the store group code as the merchant code.
Change this setting only after Tabby confirms that your codes are registered. A code Tabby does not know breaks checkout with an authorization error.
### Sell in Several Currencies
If one store group sells in more than one currency, enable **Use local store currency on checkout**. The extension then charges in the currency the customer sees and appends it to the merchant code, for example `SA_SAR`. These codes have to be registered on Tabby's side too, so ask Tabby Partner Support to set them up before you turn this on.
This documentation is built and hosted on [Mintlify](https://mintlify.com), a developer documentation platform.
Ask Tabby Partner Support at `partner@tabby.ai` (or `partner@tabby.sa` for KSA) to set them up as custom merchant codes, for example `website_store_ae`. Wait for confirmation that the codes are registered on Tabby's side.
Set **Aggregate store by currency** to **No**. The extension now sends the store group code as the merchant code.
Change this setting only after Tabby confirms that your codes are registered. A code Tabby does not know breaks checkout with an authorization error.
### Sell in Several Currencies
If one store group sells in more than one currency, enable **Use local store currency on checkout**. The extension then charges in the currency the customer sees and appends it to the merchant code, for example `SA_SAR`. These codes have to be registered on Tabby's side too, so ask Tabby Partner Support to set them up before you turn this on.
This documentation is built and hosted on [Mintlify](https://mintlify.com), a developer documentation platform.